內容簡介
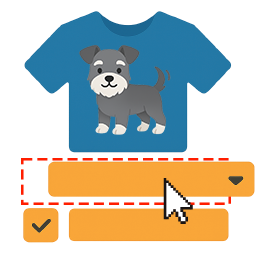
StoreCanvas Lite 是一款專為 WooCommerce 設計的外掛,提供額外的產品選項,如尺寸、顏色、刻字等,並可即時更新價格,提升顧客的購物體驗。此外掛免費使用,無需授權金鑰或帳號。
【主要功能】
• 提供 15 種選項類型,如下拉選單、單選按鈕等
• 支援 5 種定價方式,靈活調整價格
• 實時更新產品頁面價格,與購物車一致
• 條件欄位顯示,根據選擇顯示特定欄位
• 支援檔案上傳,檔名隨訂單保存
外掛標籤
開發者團隊
原文外掛簡介
StoreCanvas Lite adds extra choices to your WooCommerce products: sizes, finishes, colours, engraving text, gift wrap, gift notes, rush production, file names and more. Each choice can change the price, and the price on the product page updates as the customer picks. Free forever, with no license key, no account and no phone-home.
What your customer sees. Under the product’s price, your option fields appear above the Add to cart button. As they choose, a line such as “Base: $14.00 + options: $13.30 = $27.30” updates live. Fields you mark as required must be filled before the item can be added to the cart. Their choices then follow the order everywhere: cart, checkout, order emails and the order screen in your admin.
What you set up. On any product, open the StoreCanvas Lite tab in the Product data box and click Add field. Give the field a label, pick a type, choose how it is priced and (for dropdowns, radios and image choices) type the choices. That is all a basic option needs. Everything else (stock per choice, fields that only appear after another choice, fields reused across many products) is optional and explained step by step below.
Features
15 field types: dropdown, radio buttons, checkbox, multi-select, short text, long text, email, phone, phone (tel), number, date, colour picker, image choice, file upload (the file name is saved with the order) and section heading.
5 ways to price a field: a flat fee, a percent of the product price, an amount times a number the customer enters, an amount per character typed (engraving), or a different price for each choice (lookup table). Negative amounts work as discounts; the price never drops below zero.
Live price on the product page that matches what the cart charges, on classic and block themes.
Conditional fields: show a field only when another field has a certain value (for example, show “Gift note” only when “Gift wrap” is ticked). Hidden fields are never charged or required.
Stock per choice: give any choice its own stock count. Sold-out choices are disabled on the product page, stock goes down when an order is placed and comes back when an order is cancelled, fails, or a refund restocks it.
Option groups: build a set of fields once (for example “Gift options”) and apply it to whole product categories or a list of products.
Per role and per variation: show a field only to certain user roles (for example wholesale) or only for certain variations of a variable product.
Validation: required fields, minimum and maximum characters, number ranges and steps, and email, colour and date formats are checked before add to cart.
Orders: each choice and its price appear as line-item details in the cart, checkout, emails and admin order screen.
Compatible with WooCommerce HPOS (custom order tables), the block cart and block checkout.
Help & demo page with a one-click demo product and a support ticket form.
Setup guide
Step 1: Install and activate. In WordPress go to Plugins → Add New, search for “StoreCanvas Lite”, click Install and then Activate. WooCommerce must be active. A Help & demo link appears under the plugin’s name on the Plugins screen, and the same page lives at Products → StoreCanvas Lite help.
Step 2 (optional): Look at the demo. On Products → StoreCanvas Lite help, click Create demo data. It creates one hidden product (not shown in your shop or search) that uses every pricing type, a conditional field and stock per choice, plus one option group. Open it from the links on that page to see the product page, the live price and the cart. Click Remove demo data when you are done; uninstalling the plugin removes it too.
Step 3: Add your first field. Edit a product. In the Product data box, open the StoreCanvas Lite tab and click Add field. A new row appears. Fill in:
Label: what the customer reads, for example “Size”.
Type: for example Dropdown or Radio.
Required: tick it if the customer must choose before adding to cart.
Price: the pricing method and amount (see Step 4).
Choices: for Dropdown, Radio, Multi-select and Image choice, type the choices separated by commas (a Checkbox is a single tick box and needs no choices), for example Small, Medium, Large.
Click Update to save the product. View the product: the field is there, under the price.
Step 4: Price it. Pick one of these in the Price dropdown for each field:
Flat fee: adds the amount once when the field is used. Example: Gift wrap, Flat fee, 1.50.
Percent of product: adds that percent of the product (or chosen variation) price. Example: Premium finish, 10.
Per quantity: the customer types a number, and the amount is multiplied by it. Example: Extra name tags, Per quantity, 2.00 (5 tags = $10).
Per character (text): for text fields; each character typed costs the amount. Example: Engraving text, 0.20 (“For Ada” = 7 characters = $1.40).
Per choice (lookup table): each choice has its own price. Write the price after the choice with an equals sign: 11 oz, 15 oz=3, or Matte, Gloss=2.5, Metallic=4. A choice with no = costs nothing extra. Use a minus sign for a discount: Student=-5.
Step 5 (optional): Stock per choice. Add @ and a number after a choice to give it a stock count: Steel@40, Black=2@12, Rose gold=5@0. Here Black costs $2 extra with 12 left, and Rose gold shows as sold out. Leave the @ off and the choice is unlimited. Stock is reduced when the order is placed and returned if the order is cancelled or fails, or if you tick “Restock refunded items” on a refund. If you edit the stock while orders come in, StoreCanvas Lite applies your change to the current count instead of overwriting sales.
Step 6 (optional): Show a field only when needed. Every field shows its Field ID at the top right of its row (for example engrave). On the field that should appear later, type the other field’s ID in Show if field and the value to match in equals:
Show “Engraving text” when the checkbox “Add engraving” is ticked: Show if field engrave, equals 1 (a ticked checkbox counts as 1).
Show “Gloss care tips” only when Finish is Gloss: Show if field finish, equals Gloss.
A hidden field is never required and never charged. Fields can also be limited to user roles (Roles box, for example wholesale_customer) or to variations (Variation IDs box, the IDs shown in the Variations tab).
Step 7 (optional): Reuse fields with an option group. Go to Products → Option groups → Add option group. Give it a title, paste the fields into Fields JSON (the easiest way is to build them on one product first; a group uses the same JSON), and choose where it applies: type product IDs in Product IDs and/or tick categories under Product categories. Every product in those categories now gets the group’s fields under its own. On a product’s StoreCanvas Lite tab, group fields are listed separately with a link to their group; edit them in the group, not on the product. A product field with the same ID as a group field replaces it on that product. The ticked list under “Global option groups” adds a group to one product even when it is not assigned.
Step 8: Test an order. Add the product to the cart with some choices. The cart and checkout show each choice and the total. After checkout, the order screen in WooCommerce → Orders lists every choice under the line item.
Good to know
Prices you see on the product page are recalculated on the server for the cart and checkout, so a customer cannot change a price in the browser.
If you change a product’s price later, carts that already contain it are repriced from the new price.
Field changes apply to new add-to-carts. Orders already placed keep the choices and prices they were sold with.
The file upload field saves the uploaded file’s name with the order, not the file itself.
A paid StoreCanvas plugin (a live design canvas where customers place artwork and text on product mockups, print-ready PNG/SVG/PDF exports and a production desk) is sold separately at https://tillpress.com/storecanvas/. It is a different plugin. StoreCanvas Lite is complete on its own and is never locked or time-limited.
External services
StoreCanvas Lite has no license check, no telemetry, no account, and makes no outbound requests during normal use. The one exception is a support ticket you choose to send.
Support tickets (only when you send one): the Help & demo page has a support form. When an administrator fills it in, ticks the consent box, and presses Send ticket, the plugin sends the name, reply-to email, topic, subject, message, this site’s address, and (if ticked) a system report of WordPress/WooCommerce/PHP versions, theme, and active plugin names to the Tillpress support desk at https://tillpress.com/wp-json/tp/v1/support. Nothing is sent automatically, in the background, or on a schedule, and no passwords, keys, or customer/order data are included. Service provider: Tillpress (Alex Software Holdings LLC). Privacy policy: https://tillpress.com/privacy/ — Terms: https://tillpress.com/terms/ . “Email instead” opens the same ticket in your own email app and sends nothing from the site.