前言介紹
- 這款 WordPress 外掛「Code Embed」是 2009-04-04 上架。
- 目前有 20000 個安裝啟用數。
- 上一次更新是 2025-04-12,距離現在已有 21 天。
- 外掛最低要求 WordPress 4.6 以上版本才可以安裝。
- 外掛要求網站主機運作至少需要 PHP 版本 7.4 以上。
- 有 45 人給過評分。
- 還沒有人在論壇上發問,可能目前使用數不多,還沒有什麼大問題。
外掛協作開發者
dartiss |
外掛標籤
css | code | html | embed | javascript |
內容簡介
注意: WordPress 5.0 及以上版本的使用者請查看常見問題以了解如何在區塊編輯器中使用此外掛。
Code Embed 外掛允許您在文章中嵌入程式碼(JavaScript 和 HTML - 無法用於伺服器端的程式碼,如 PHP),而不會因編輯器改變內容而造成干擾。這非常有用,可以嵌入第三方腳本等。這個外掛被許多大型網站使用,包括 Mozilla 瀏覽器的官方網站。
主要功能包括...
將 HTML 或 JavaScript 嵌入文章或頁面──特別適用於嵌入影片!
使用 Widget Logic 外掛嵌入小工具
全域嵌入 allowser 可以在一篇文章或頁面中設置一些程式碼並從另一文章或頁面中存取
修改用於嵌入程式碼的關鍵字或識別碼使其符合您的需求
通過簡單搜索選項搜尋嵌入程式碼
添加簡單的後綴以將嵌入式影片轉換為響應式輸出
使用 URL 直接嵌入外部腳本
還有更多的功能!
本外掛的圖示由非常有才華的 Janki Rathod 設計 ♥️
👉 詳細的程式碼開發、預定增強功能和已知問題,請訪問 Github 頁面 👈
入門指南
下面是使用本插件的簡單方法...
安裝完插件後,開始撰寫一篇新文章或新頁面。
在「自訂欄位」框中輸入「CODE1」作為名稱,您要嵌入的程式碼作為值。儲存這個設定。
在您的文章中加入 {{CODE1}},這個程式碼將顯示在此位置。
當您檢視此文章或頁面時,{{CODE1}}會被嵌入您所要求的程式碼替代。
如果您無法在文章編輯器畫面中找到「自訂欄位」框的位置,請查看常見問題以獲得更多資訊。
這樣您就可以開始使用囉!如需更多的資訊和進階選項,請參照下方或參閱Elftronix 的使用指南。
選項設定
在管理選單中,有一個名為「Code Embed」的設定選項。
程式碼嵌入是透過特殊關鍵字進行的,您必須使用此關鍵字來唯一識別您想要嵌入程式碼的位置。此關鍵字包括一個開關識別碼(放在開頭),一個關鍵字,以及一個關閉識別碼。如果您希望在同一文章中嵌入多個程式碼,您也可以在關鍵字末端添加後綴。
在這個選項螢幕上,您可以指定您要使用的識別碼。 預設的開啟和關閉識別碼為百分比符號,關鍵字為 CODE。在這些說明中,所有範例中都將使用這些預設值。
此選項螢幕僅在具有管理選項或更高權限的使用者才可以使用。其他 Code Embed 選項則對具有編輯文章或更高權限的使用者開放。
嵌入
要在文章中嵌入程式碼,您需要在文章下方「自訂欄位」框中找到「Custom Fields」 meta 框。
原文外掛簡介
Code Embed allows you to embed code (JavaScript, CSS and HTML – it can’t be used for server-side code, such as PHP) in a post, without the content being changed by the editor. This is incredibly useful for embedding third-party scripts, etc. The plugin is used by many large sites, including Mozilla.
Key features include…
Add HTML or JavaScript to posts or pages – particularly useful for embedding videos!
Embed in widgets using the Widget Logic plugin
Global embedding allows you set up some code in one post or page and then access it from another
Modify the keywords or identifiers used for embedding the code to your own choice
Search for embedding code via a simple search option
Add a simple suffix to the embed code to convert videos to responsive output
Embed an external script directly using just the URL
And much, much more!
Iconography is courtesy of the very talented Janki Rathod.
Please visit the Github page for the latest code development, planned enhancements and known issues
Getting Started
To use this plugin, you need to have custom fields enabled on your site. If you’re using the block editor, you may need to switch this on first – please scroll down to the next section to learn how to do this. If you’re using the classic editor then you’ll find the custom fields at the bottom of the editor screen.
Although this plugin works for both posts and pages for simplicity I will simply refer to posts – bear in mind that pages work in the same way.
Once you have custom fields switched on, here’s how easy it is to use…
Once you have the plugin installed start a new post.
Scroll down to the bottom of the screen and look for the “Custom Fields” section.
Under “Add New Custom Field” enter a name of CODE1 and your embed code as the value
In your post content add {{CODE1}} where you wish the embed code to appear.
And that’s it – when the post viewed or previewed {{CODE1}} will be replaced with the code that you asked to be embedded.
This should get you started – for more information and advanced options please see below.. Alternatively, there’s a fantastic guide at Elftronix which I would recommend.
Using this plugin with the block editor (aka Gutenberg)
By default, custom fields are hidden inside the block editor but can be revealed.
Edit or create a post
Click the settings button (three dots) in the top, right-hand corner
Go to Preferences
Click the Panels tab
You will find a button to toggle the ‘Custom Fields’ meta box – make sure this is toggled to “on”
A button should appear titled “Enable & Reload” – you’ll need to click on that and wait for the page to reload before the custom fields will appear
Check out the screenshots for how the custom fields should look.
I can’t find the custom fields
For block editor users, I’m assuming you’ve done the above. For classic editor users, the custom fields should be present by default. In all cases they should appear at the bottom of the editor screen.
From version 2.4, anyone without the “unfiltered HTML” capability won’t be able to see custom fields, for added security. Please see the section “Custom Field Security”, below, for more details.
If none of the above applies then you may have a theme or plugin that removes this or may have a problem with your WordPress installation – you will need to try the usual diagnostics to try and resolve this, including requesting help on the WordPress support forum.
Please bear in mind that the custom fields functionality is part of WordPress so it would be greatly appreciated if you don’t give me poor reviews in this situation as, I say, this component is not part of this plugin but, by using it, keeps this plugin simple to use and bloat-free 🙂
The Code Embed Options Screen
Whilst in WP Admin, if you go to Settings -> Code Embed, you’ll be able to access the options that are available for this plugin.
Code embedding is performed via a special keyword that you must use to uniquely identify where you wish the code to appear. This consist of an opening identifier (some that that goes at the beginning), a keyword and then a closing identifier. You may also add a suffix to the end of the keyword if you wish to embed multiple pieces of code within the same post.
From this options screen you can specify the above identifier that you wish to use. By default the opening and closing identifiers are percentage signs and the keyword is CODE. During these instructions these will be used in all examples.
The options screen is only available to those that with a capability of able to manage options or greater. All the other Code Embed menu options are available to users with a capability to edit posts or greater.
How to Embed Code
To embed in a post you need to find the meta box under the post named “Custom Fields”. If this is missing you may need to add it by clicking on the “Screen Options” tab at the top of the new post screen.
Now create a new custom field with the name of your keyword – e.g. CODE. The value of this field will be the code that you wish to embed. Save this custom field.
Now, wherever you wish the code to appear in your post, simply put the full identifier (opening, keyword and closing characters). For example, {{CODE}}.
If you wish to embed multiple pieces of code within a post you can add a suffix to the keyword. So we may set up 2 custom fields named CODE1 and CODE2. Then in our post we would specify either {{CODE1}} or {{CODE2}} depending on which you wish to display.
Don’t forget – via the options screen you can change any part of this identifier to your own taste.
How to Embed Code from an External URL
If you specify a URL within your post, surrounded by your choice of identifiers, then the contents of the URL will be embedded within your post.
Obviously, be careful when embedding a URL that you have no control over, as this may be used to hijack your post by injecting, for example, dangerous JavaScript.
For example, using the default options you could embed the contents of a URL using the following method…
{{http://www.example.com/code.php}}
or
{{https://www.example.com/code.html}}
How to Use Global Embedding
You can also create global embeds – that is creating one piece of embed code and using it in multiple posts or pages.
To do this simply make reference to an already defined (but unique) piece of embed code from another post or page.
So, let’s say in one post you define a custom field named CODE1. You can, if you wish, place {{CODE1}} not just in that post but also in another and it will work.
However, bear in mind that the embed code name must be unique – you can’t have defined it in multiple posts otherwise the plugin won’t know which one you’re referring to (although it will report this and list the posts that it has been used in).
In the administration menu there is a sidebar menu named “Tools”. Under this is a sub-menu named “Code Search”. Use this to search for specific embed names and it will list all the posts/pages that they’re used on, along with the code for each.
Embedding in Widgets
Natively you cannot use the embed facilities within sidebar widgets. However, if you install the plugin Widget Logic then Code Embed has been set up to make use of this and add the ability.
Install Widget Logic and activate.
In Administration, select the Widgets page from the Appearance menu. At the bottom there will be a set of Widget Logic options.
Ensure Use ‘widget_content’ filter is ticked and press Save.
Although you cannot set up embed code within a widget you can make reference to it, for example by writing {{CODE1}} in the widget.
Responsive Output Conversion
Responsive output is where an element on a web page dynamically resizes depending upon the current available size. Most video embeds, for instance, will be a fixed size. This is fine if your website is also of a fixed size, however if you have a responsive site then this is not suitable.
Code Embed provides a simple suffix that can be added to an embed code and will convert the output to being responsive. This works best with videos.
To use, when adding the embed code onto the page, simply add _RES to the end, before the final identifier. For example, {{CODE1_RES}}. The _RES should not be added to the custom fields definition.
This will now output the embedded code full width, but a width that is dynamic and will resize when required.
If you don’t wish the output to be full width you can specify a maximum width by adding an additional _x on the end, where x is the required width in pixels. For example, {{CODE1_RES_500}} this will output CODE1 as responsive but with a maximum width of 500 pixels.
It should be noted that this is an experimental addition and will not work in all circumstances.
Embedding in excerpts
By default embed code will not appear in excerpts. However, you can switch this ability on via the Code Embed options screen. If you do this then the standard rules of excerpts will still apply, but now once the code embed has applied – for example, excerpts are just text, a specific length, etc.
Filtering of code
By default, WordPress allows unfiltered HTML to be used by users in post custom fields, even if their role it set up otherwise. This opens up the possibility of leaving a site vulnerable, if any plugins that uses this data doesn’t check it appropriately.
“Out of the box”, neither the contributor and author roles have unfiltered HTML capabilities but can access custom post fields.
As this plugin requires the use unfiltered HTML, we need to ensure that the only users who use it, should be using it. From version 2.5, any users without this permission that update a post containing embeds from this plugin will cause the code to be filtered.
Reviews & Mentions
“Works like a dream. Fantastic!” – Anita.
“Thank you for this plugin. I tried numerous other iframe plugins and none of them would work for me! This plugin worked like a charm the FIRST time.” – KerryAnn May.
Embedding content – WSD Blogging Server.
Animating images with PhotoPeach – Cómo hago.
各版本下載點
- 方法一:點下方版本號的連結下載 ZIP 檔案後,登入網站後台左側選單「外掛」的「安裝外掛」,然後選擇上方的「上傳外掛」,把下載回去的 ZIP 外掛打包檔案上傳上去安裝與啟用。
- 方法二:透過「安裝外掛」的畫面右方搜尋功能,搜尋外掛名稱「Code Embed」來進行安裝。
(建議使用方法二,確保安裝的版本符合當前運作的 WordPress 環境。
1.0 | 1.1 | 1.2 | 1.3 | 2.4 | 1.4.1 | 1.5.1 | 1.6.1 | 2.0.2 | 2.1.2 | 2.2.2 | 2.3.9 | 2.5.1 | trunk |
延伸相關外掛(你可能也想知道)
Shortcoder — Create Shortcodes for Anything 》Shortcoder 外掛可讓您建立 HTML、JavaScript、CSS 和其他代碼片段的自訂捷徑。現在,這些捷徑可以在文章/頁面中使用,並且該片段將取代其位置。, ✍ 輕鬆建立...。
Enable jQuery Migrate Helper 》隨著 WordPress 5.5 的更新,一個名為 jquery-migrate 的遷移工具不再默認啟用。這可能會導致一些主題或外掛在運行舊代碼時缺少功能或出現意外行為。, 此外掛...。
 Async JavaScript 》使用 Async Javascript 解決 above-the-fold 內容的 Render-blocking Javascript 問題。, Render-blocking Javascript 會導致 above-the-fold 內容在 Javascr...。
Speculative Loading 》- 這個 WordPress 外掛支援 Speculation Rules API,該 API 可以根據使用者互動,定義規則來動態預取或預渲染特定的 URL。, - 請參閱 Speculation Rules WICG...。
Scripts n Styles 》這個外掛讓管理員用戶能夠將自訂的 CSS 和 JavaScript 直接添加到個別文章、頁面或任何註冊的自訂文章類型中,也可以將類別添加到 body 標籤和文章容器中。還...。
jQuery Updater 》此外掛更新jQuery至最新的官方穩定版本,該版本通常不會在WordPress最新的穩定版本中提供。, jQuery Migrate也包含在內,以實現向下相容性。, 不會替換任何檔...。
Theme Authenticity Checker (TAC) 》掃描所有主題文件,尋找潛在的惡意或不需要的程式碼。, TAC 是什麼, TAC 代表主題真實性檢查器。TAC 搜尋每個安裝主題的原始檔案,尋找惡意程式碼的跡象。如...。
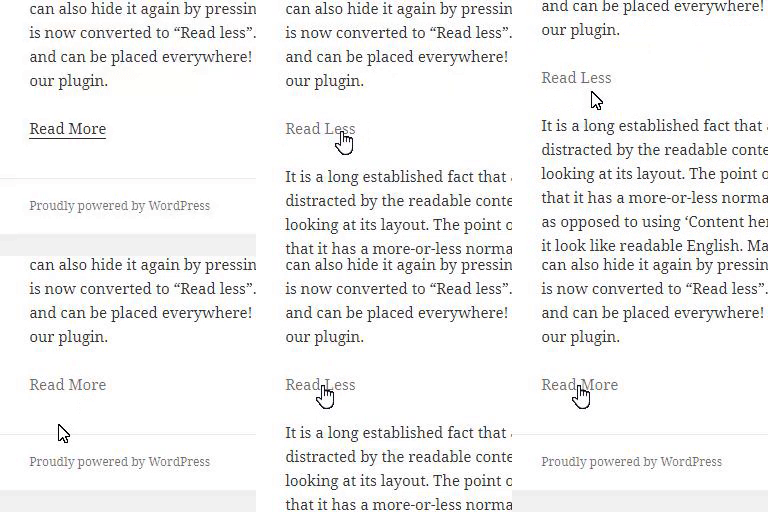
 Read More Without Refresh 》你想顯示更多內容,但不影響使用者體驗嗎?, 我的外掛可以幫你解決這個問題!, 這個外掛透過短碼,可以隱藏預先定義好的文字,而根據你的選擇,只顯示剩下的...。
Raw HTML 》is capability is only granted to administrators. If you’re not an admin, you will need to ask them to add it to your role., Raw HTML is not r...。
SOGO Add Script to Individual Pages Header Footer 》已經在 Gutenberg 上進行測試, 創建一個簡單的方式,為個別頁面、文章或自訂文章類型的標題和頁腳添加 JavaScript 代碼,, 例如: 在感謝頁面上添加轉換代碼, ...。
 BJ Lazy Load 》延遲載入可使您的網站加載速度更快,並節省頻寬。, 此外掛可取代您所有的文章圖片、文章縮略圖、大頭貼圖片和內容的 iframe,並使用佔位圖片,當訪客滾動頁面...。
Web Worker Offloading 》**總結:**, 這個外掛將 JavaScript 執行工作委派給 Web Worker,在釋放主執行緒的同時提高了效能。這將導致互動至下一次繪製(INP)分數的提升。值得注意的...。
 WP Super Minify • Minify, Compress and Cache HTML, CSS & JavaScript 》這個外掛可以在需要時結合、縮小和緩存內聯的 JavaScript 和 CSS 文件,以加快頁面加載速度,並使用Minify PHP Framework。, 啟用此外掛後,您會發現您的 HTM...。
Use Google Libraries 》e's content distribution network (CDN) URLs for the supported libraries., This hook is used to replace the default WordPress registered script sour...。
 Custom CSS and JavaScript 》這款外掛可以讓您在 WordPress 網站中添加自訂全站 CSS 樣式和 JavaScript 代碼,有助於覆蓋佈景主題樣式和添加客戶端功能。功能包括:, , 代碼編輯器,帶有...。
