內容簡介
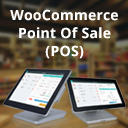
MultiPOS 是一款免費的 WooCommerce 銷售點外掛,適合在線和實體店鋪使用。它將任何瀏覽器轉變為收銀機,讓商家能夠輕鬆管理銷售、庫存和客戶資料,並將交易記錄保存為 WooCommerce 訂單。
【主要功能】
• 自訂 POS URL,輕鬆訪問收銀機介面
• 支援條碼掃描與商品搜尋
• 無限數量的收銀員角色管理
• 收據列印與條碼標籤列印功能
• 客戶管理與優惠券應用
• POS 銷售記錄保存為 WooCommerce 訂單
外掛標籤
開發者團隊
② 後台搜尋「MultiPOS – Point of Sale (POS) for WooCommerce, Barcode Scanner & Cash Register」→ 直接安裝(推薦)
原文外掛簡介
MultiPOS is a free WooCommerce point of sale plugin for shops that sell online and over a counter. It turns any browser into a cash register at a URL you choose, such as yoursite.com/pos.
A cashier opens that URL, logs in, and lands on the sales screen. From there they search products, scan a barcode, add a customer, apply a coupon, take payment, and print a receipt. The sale is saved as a real WooCommerce order, so your stock, taxes, coupons, customer records, and order list keep working the way they already do.
The free version covers a first POS setup end to end: one outlet, unlimited cashiers, WooCommerce stock, barcode scanning and label printing, receipt printing, customer management, and a POS dashboard. It suits small retail counters, grocery and convenience shops, pickup desks, market stalls, pop-up shops, and cafes that want in-person sales recorded inside WooCommerce instead of a separate till.
No monthly fee, no external POS account, and no store data leaving your site.
Quick Links
View Product Page
Live Demo
Watch the Video Overview
Full Documentation
Free vs Pro Comparison
Contact Support
Upgrade to Pro
Video Overview
What you get in the free version
A point of sale terminal on your own site, at a URL path you pick
Setup wizard for the first configuration
One active outlet, in grocery/retail or restaurant/cafe mode
Unlimited cashiers using a dedicated POS Cashier role
Product search by title, ID, SKU, or barcode
Barcode scanning to add items to the cart
WooCommerce stock check before the order is created
Cash payment with tendered amount and change, plus your own payment method labels
POS sales saved as normal WooCommerce orders
POS order marker in the WooCommerce orders list
Customer search, add, edit, and delete from the POS screen
WooCommerce coupon codes at POS checkout
Hold a cart and come back to it later
Receipt printing with configurable roll width, height, and margin
Barcode label printing for products, with page and label sizing
POS dashboard with orders, revenue, cashiers, and top payment method
Transaction log of POS activity
Login screen text, logo, and colour settings
POS colours, font family, font size, corner radius, and product card layout
Translation ready, .pot file included
Compatible with WooCommerce High-Performance Order Storage (HPOS)
How it works
After activation, a MultiPOS panel appears in your WordPress admin.
Run the setup wizard, or open MultiPOS > Configuration
Enable the Point of Sale module
Choose the POS URL path, for example pos
Set up your outlet and enter its address
Create a cashier from MultiPOS > Cashiers
Open the POS terminal and take your first in-person sale
Cashiers never need WordPress admin access. They log in on the POS screen itself.
Free WooCommerce POS features in detail
Point of sale terminal on your own site
The POS terminal is a single sales screen built for a busy counter.
Open the register from a custom URL such as /pos
Administrators, shop managers, and POS cashiers can all get in
Search the WooCommerce catalogue by title, ID, SKU, or barcode
Add products by tapping a card or by scanning a barcode
See stock counts on the product cards
Pick the product card orientation from the admin
WooCommerce prices, taxes, and coupons apply exactly as they do online
Hold an unfinished cart and pick it up again later
Print the receipt as soon as payment is taken
Barcode scanning and barcode label printing
Barcodes work in both directions: scanning items at the till, and printing labels for the shelf.
Choose product ID or SKU as the barcode source
Print barcode labels from the admin product barcode screen
Set label page width, height, margins, barcode height, spacing, and orientation
Scan or type a barcode value at the POS to drop the product into the cart
Any keyboard-wedge barcode scanner works, which covers most USB and Bluetooth scanners. The scanner simply types the code into the barcode box, so there is nothing extra to install.
POS sales saved as WooCommerce orders
In-person sales land in WooCommerce, not in a separate ledger.
Every POS sale creates a real WooCommerce order
Set the initial order status for POS orders
Choose whether WooCommerce order emails go out after POS checkout
POS source details appear in the WooCommerce orders list
Review POS orders from the MultiPOS admin orders screen
Outlet, cashier, payment method, tendered amount, and table are stored as order meta
Stock is checked against WooCommerce before the order is created
Cashier logins without WordPress admin access
MultiPOS adds a dedicated POS Cashier role.
Add as many cashiers as you need, at no cost
Administrators and shop managers can use the POS too when they need to
Cashiers edit their own basic profile from the POS settings tab
Cashiers can review recent orders and the day’s cash movement from inside the POS
Cashier and outlet are attached to every order for accountability
Turn “remember me” and “forgot password” on or off for the POS login screen
Outlet setup for a retail counter or cafe
An outlet is the physical place where the selling happens.
One active outlet in the free version
Store the outlet name, address, phone, and email
Choose grocery/retail mode or restaurant/cafe mode
Pick which payment methods are available at that outlet
Mark the outlet active or inactive to open or close the register
Outlet address feeds POS tax handling and printed receipts
Restaurant and cafe mode adds a tables tab in the POS, so an order can be attached to a dining table you defined in the settings.
Payment methods and cash handling
The free version ships with Cash and lets you name the rest.
Cash payment with tendered amount and automatic change
Add your own payment method labels, for example Card, UPI, or Bank Transfer
Enable or disable each method, and choose which ones the outlet uses
The chosen method is saved with the WooCommerce order and shown in the transaction log
Splitting a single order across several payment methods and cash drawer tracking are Pro features.
Customers and coupons at the counter
Cashiers handle customer records without leaving the sales screen.
Search existing WooCommerce customers
Add a new customer in the middle of a sale
Edit or delete a customer when needed
Set a default guest account for walk-in sales
Apply and validate WooCommerce coupon codes at POS checkout
Receipt printing and printer sizing
The free version ships one receipt template, translatable through your normal WordPress translation files.
Print the receipt straight after checkout
Set receipt roll width, height, and margin to match your thermal printer
Set barcode label size and print orientation separately
Receipts carry outlet details, order details, customer details, totals, taxes, and payment data
Composing your own receipt layouts and managing more than one template are Pro features.
POS dashboard and transaction log
The admin dashboard answers the question “how did we do today”.
Summary cards for total orders, revenue, cashiers, and top payment method
Revenue chart with date range filters
Payment method breakdown next to recent POS orders
Recent POS orders table
Transaction list showing outlet, cashier, method, amount, and date
Search and filter on the admin lists
Branding the POS login screen
Small settings that make the till look like your shop.
Setup wizard on first activation
Turn the Point of Sale module on or off
Change the POS login heading, subtitle, footer, and button label
Upload your own logo for POS screens and receipts
Set login screen background, card, and text colours
Change POS colours, font family, base font size, and corner radius
For developers
MultiPOS is built on WordPress and WooCommerce hooks.
REST API namespace: ddwcpos/v1
Routes for products, categories, customers, countries and states, coupons, stock checks, order creation, order listing, and cashier saving
PHP hooks for order creation, POS access, outlet data, products, customers, transactions, and API responses
JavaScript filters and actions inside the React POS app
HPOS compatibility declared for WooCommerce custom order tables
Text domain: devdiggers-multipos-for-woocommerce
MultiPOS Pro
Pro is for stores that outgrow a single counter: more branches, more payment flows, or a kitchen to feed.
Multiple outlets and staff
Unlimited outlets
Assign different cashiers to different outlets
Outlet-specific workflows
Outlet stock controls for multi-location inventory
Advanced checkout
Variable products alongside simple products
Multiple and split payments on one order
Order notes at POS checkout
Custom product entries typed at the till
Weight or unit based pricing
Cash drawer tracking
Custom barcode value per product
Offline order handling with later sync
Restaurant and kitchen
Kitchen display URL
Send held orders to the kitchen
Restaurant table workflows
Dine-in and takeaway handling
Print a held order receipt to collect payment
Kitchen preparation status tracking
Reports and inventory
Dedicated POS reports with filters and exports
Revenue stats by date range
Product performance reports
Coupon usage reports
Order statistics by outlet
Tax reports and summaries
Outlet-specific stock editing
App and receipts
Progressive Web App configuration
Custom app name, icon, splash colour, and theme colour
More product and variation display options
Full receipt composer and multiple receipt templates
Upgrade to MultiPOS Pro
External services
This plugin relies on the following third-party services provided by DevDiggers (https://devdiggers.com). These connections only happen inside the WordPress admin area and are described below so you know exactly what is sent, why, and when.
1. DevDiggers extensions directory
What it is: A read-only API on devdiggers.com that returns the public list of DevDiggers WooCommerce extensions.
What it is used for: To display available DevDiggers extensions on the plugin’s “Extensions” admin page.
When data is sent: Only when a logged-in administrator opens the “Extensions” admin page. The response is cached for 24 hours, so the request is not repeated on every page load.
What data is sent: A standard outbound HTTP request only (your server’s IP address and a plugin user-agent string, as with any web request). No personal data and no store data are sent.
Endpoint: https://devdiggers.com/wp-json/ddwcs/v1/plugins
2. Newsletter subscription (optional)
What it is: A contact/newsletter endpoint on devdiggers.com.
What it is used for: To add your email address to the DevDiggers newsletter, only if you explicitly choose to subscribe.
When data is sent: Only when an administrator submits the optional newsletter form in the plugin dashboard. Nothing is sent automatically.
What data is sent: The email address you enter and your site URL.
Endpoint: https://devdiggers.com/
These services are provided by DevDiggers. By using them you agree to the DevDiggers Terms and Conditions (https://devdiggers.com/terms-and-conditions/) and Privacy Policy (https://devdiggers.com/privacy-policy/).
Source code and build tools
The JavaScript and CSS shipped in this plugin are compiled with webpack. The complete, human-readable source code (including the POS React app, admin, login, dashboard and user-page scripts/styles, the bundled framework source, and all build configuration) is published in our public GitHub repository:
https://github.com/DevDiggers-Technologies/multipos-for-woocommerce
To rebuild the compiled assets from source:
Clone the repository above and install Node.js (16+).
Run npm install to install the build dependencies listed in package.json.
Run npm run build to generate the production files in assets/js/ and assets/css/.
Build tools used: webpack, Babel, and the @wordpress/* script dependencies declared in package.json.