內容簡介
Zoho PageSense for WordPress 外掛能夠輕鬆將 WordPress 網站與 Zoho PageSense 連接,幫助使用者透過數據分析優化網站性能,提升轉換率,並改善訪客體驗。
【主要功能】
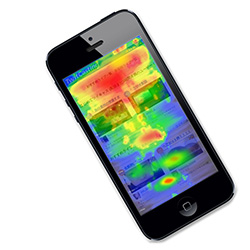
• 訪客洞察:透過熱圖、會話錄影等了解用戶行為
• 實驗測試:測試不同頁面版本以找出最佳表現
• 個性化體驗:為不同受眾提供相關網站內容
• 訪客互動:使用彈出視窗和調查減少訪客流失
• 整合平台:將分析、測試和互動功能整合於一
外掛標籤
開發者團隊
② 後台搜尋「Zoho PageSense for WordPress」→ 直接安裝(推薦)
原文外掛簡介
Zoho PageSense
Zoho PageSense for WordPress Plugin
Connect WordPress with Zoho PageSense in just a few clicks and start optimizing your website without manually adding tracking scripts.
Stop relying on guesswork to improve conversions. Understand what visitors do on your website, identify where they drop off, and optimize their journey using data-backed insights.
What you get
Visitor insights
Understand how users interact with your website through heatmaps, session recordings, funnels, and form analytics.
Experimentation
Test different versions of pages, content, layouts, and CTAs to identify what performs better.
Personalization
Deliver relevant website experiences to different audience segments.
Visitor engagement
Use popups, polls, and push notifications to capture attention and reduce drop-offs.
When should you use this plugin?
This plugin is useful if you want to:
Improve landing page performance
Reduce visitor drop-offs
Fix underperforming forms
Validate website changes before launching them
Increase conversions without redesigning your website
Why choose PageSense?
Instead of using separate tools for analytics, testing, personalization, and engagement, Zoho PageSense brings everything together in one platform that works directly with WordPress.
Prerequisites
Active Zoho PageSense account
Admin access to your WordPress website
How it works
Install the plugin, connect your account, select your project, and start tracking visitor activity.
Detailed SETUP
Here’s a step-by-step guide that will help you to configure Zoho PageSense for WordPress:
1. Login to your Zoho PageSense account. If you don’t have an account yet, sign up by following this link and get your free trial now.
2. Login to your WordPress account as an admin.
3. In your WordPress admin dashboard, go to Plugins > Add New, search for Zoho PageSense for WordPress, and then install and activate the plugin to begin the integration.
4. Open the Zoho PageSense plugin in WordPress and enter your client ID and Client Secret.
a. Open https://api-console.zoho.com. Click Get Started and then click Server-based Applications.
b. Create a new client by entering the Client Name, Homepage URL(WordPress URL), and Redirect URL as “https://pagesense.zoho.
com/wpredirect” (make sure you data center details folowed the url)
c. Click Create. Once the client is created, the Client ID and Client Secret will be displayed. Copy these credentials for use in the WordPress plugin configuration.
5. In the WordPress admin dashboard, navigate to Zoho PageSense and click Connect to start the integration process.
6. When prompted, enter the Client ID and Client Secret generated in the Zoho API Console, then click Login.
7. Review the permissions requested by Zoho PageSense and click Accept to authorize the connection between your WordPress site and Zoho PageSense
8. After successful authorization, choose the Space and Project you want to associate with your WordPress site. The Zoho PageSense tracking code will be automatically installed, and your integration will be complete.
MANUAL SETUP (OPTIONAL)
If your theme restricts plugin injection, you can manually add the PageSense tracking script to your site’s .
SUPPORT
Need help? Contact:
[email protected]