
內容簡介
您是否厭倦了對於類別和標籤存檔頁面的單調列表呈現形式?
這個外掛讓您能夠自由定制頂部說明區域,以HTML或shortcode來改進使用者界面和增進存檔頁面的搜尋引擎優化,使您能夠將您的類別存檔頁面或標籤頁面轉變成一個完整的登陸頁面,不再僅僅是一個帖子或產品清單,而是充滿特色的定制頁面,可以讓訪客和搜索引擎都充滿了期待。
「類別編輯器」能夠運作在任何符合WordPress標準規範,並且包含了類別說明呼叫的主題上。
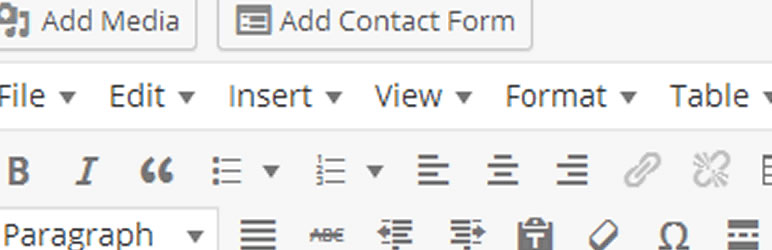
外掛在管理介面中為類別說明區域增加了一個WordPress編輯器,可以讓您在帖子清單之前全面地改變說明區域的格式和設計。
這個外掛非常適合博客,完全適合於Woocommerce和其他電商外掛。只要主題呼叫了WordPress類別、標籤或項目說明區域,您就有能力使這個区域获得格式和设计。
您可以添加媒體、使用shortcode並使用圖片和任何您能想到的東西來提高您的類別存檔頁面的效果。
在版本更新為「類別編輯器Pro」之後,使用這個外掛您還將擁有額外的說明區域選項,位於帖子或產品清單的末尾。在許多情況下,這顯得非常有用,因為您想要添加大量額外的內容至存檔頁面,但不希望遊客必須往下滾動才能看到產品或帖子清單。
類別圖片菜單網格
您可以將一張圖片分配給一個類別,並且使用shortcode來顯示一組類別。這使得您有機會在博客帖子或頁面上製作圖形化菜單或強調某些類別。 這適用於WordPress博客類別。
在類別編輯頁面上,使用“上傳圖片”連接將圖片分配給類別。您可以上傳圖片或從媒體庫中選擇一張。 上傳或選擇後,您需要單擊“文件URL”按鈕來獲取完整的URL。將其複製並粘貼到分配到類別的文本區域中。
您可以使用shortcode [catimmg](不加空格)來呼叫所有類別。您可以使用2個屬性:
數量-限制要呼叫的類別總數。
類別-允許您使用類別ID號碼選擇要顯示的類別。
完整的shortcode可以看起來像:[catimmg categories=”123,2356,675,9876″],這將顯示圖片和鏈結到指定的類別,並使用一個以逗號分開的類別ID號碼列表。
另一個可以是[catimmg number=”5″],這將限制顯示的類別數量為5。
類別圖形菜單的樣式設計
此列表沒有應用任何樣式。可用的CSS包括:
.catimgmain - 這是主要容器
.catimmgeach - 這是個別的類別容器
.cattitle - 這是類別的標題
我在故意留下css樣式的部分並不是由於樣式設計低落,而是讓您可以自選樣式如何顯示,現在有很多用CSS製作網格的方式,每個人都有自己喜愛的方法。以下是一個CSS樣式的例子,您可以將它添加到您的定制CSS選項裡。
.catimgmain{display:block;}
.catimmgeach{display:inline-block;width:20%;vertical-align:bottom;margin:10px;}
.cattitle{font-weight:600;}
Og:image支援功能
版本3.8引入了Og:ima
外掛標籤
開發者團隊
📦 歷史版本下載
原文外掛簡介
Are you bored of plain old lists for your category and tag archive pages?
This plugin gives you the ability to pimp up your archives with a fully customisable top description area. You can use html or shortcodes to give a better uder interface and boost the search engine optimisation of archive pages. This means you can turn your category archive page or tag page into a fully developed landing page. No longer just a plain list of posts or products but a customised page packed full of features that will excite your visitors and the search engines.
Category Editor works with any theme that is written to WordPress standards and includes the category description call.
The plugin adds a WordPress editor to the category description area in the admin and the editor allows you the full options to format and design your top description area before the lists of posts.
It’s ideal for blogs and is fully compatible with Woocommerce and other ecommerce plugins. Provided the theme calls the WordPress category, tag or terms description then you have the ability to format and design the area.
Add media, use shortcodes and turbo charge the category archive page with images and anything else you can think of.
With the PRO version (now renamed Category Editor Pro) you also get the option to have an additional area of description at the end of the lists of posts or products. This is really useful for many situations when you want to add lots of extra content to the archive page but don’t want visitors to have to scroll down to get to the list of products or posts.
Category Image Menu Grid.
You can assign an image to a category and then use a shortcode to display a list of the categories. This gives you the opportunity to make a graphical menu or highlight certain categories on blog posts or pages. This works with WordPress blog categories.
In the category edit page assign an image to the category with the upload image link. Either upload and image or use one from your media library. Once uploaded or chosen you need to click on the file url button to get the full url. Copy that and paste it into the text area to assign to category.
You can use the shortcode [ catimmg ] (without spaces) to call all your categories. There are 2 attributes you can use:
number – this limits the total number of categories to call.
categories – this allows you to chose which category to display using the category id number.
A full shortcode could look like : [ catimmg categories=”123,2356,675,9876″ ] this will display the images and link to the named categories using a comma separated list of category ids.
Another could be [ catimmg number=”5″] this would limit the number of categories displayed to 5.
Styling of category graphic menu
There has been no styling applied to this list. The css available is:
.catimgmain – this is the main container
.catimmgeach – this is the individual category containers
.cattitle – this is the title of the category
I’ve intentionally left the css styling empty so you can choose how to display the menu yourself. There’s lots of ways to produce grids now in css and everyone has their personal favourite. As a start here is an example css style you can add to your customise > additional css option.
.catimgmain{display:block;}
.catimmgeach{display:inline-block;width:20%;vertical-align:bottom;margin:10px;}
.cattitle{font-weight:600;}
Og:image support
Version 3.8 has introduced og:image option for WordPress categories and Woocommerce product categories. The og:image meta property is used by social platforms to display your prefered image when someone shares your page to a social platform.
Pro Version:
The pro version of CategoryTinyMce offers:
og:image option also available for wordpress tags and Woocommerce product tag archives.
A second description areas below the list of blog or products to help you build out SEO on category and tag pages.
The graphical menu shortcode also works for tags. There are also additional shortcodes to help make life easier such as only displaying parent categories or only displaying child categories of current category.
Support:
The free version of the plugin gets limited support. I check the support forum every week or two to see if there is any issues that need addressing. I do not provide email or one to one support for the free version.
If you want quick support (Monday – Friday, 9.00am – 5.00pm UK time) then you will need to use the PRO version.